Rendering HTML Templates with Flask
Learn how to create a templates folder, add HTML files, pass variables to templates, and render templates using Flask's template engine.
In web development, rendering HTML templates is a common task when building dynamic web applications. Flask, a popular web framework in Python, provides a built-in template engine that makes it easy to generate dynamic HTML content. In this tutorial, we will learn how to render HTML templates with Flask.
Prerequisites
Before we begin, make sure you have the following installed:
- Python: You can download and install Python from the official Python website.
- Flask: You can install Flask using pip by running the command
pip install flaskin your terminal or command prompt.
Refer to our tutorial on setting up a Flask development environment for more information.
Creating a Templates Folder and Adding HTML Files
To start rendering HTML templates with Flask, we need to create a folder called “templates” in our project directory. Flask automatically looks for this folder when rendering templates.
Here’s how you can create the templates folder and add HTML files:
- Create a new directory for your Flask project.
- Inside the project directory, create a new folder named “templates”.
- Within the “templates” folder, create a new HTML file, for example, “index.html”.
Your project directory structure should look like this:
1
2
3
project/
├── templates/
│   └── index.html
You can add multiple HTML files inside the “templates” folder, depending on your application’s needs.
Passing Variables to Templates
Flask allows us to pass variables from our Python code to the HTML templates. This enables us to dynamically generate HTML content based on the data we have.
To pass variables to templates, we need to use the render_template function provided by Flask.
Here’s an example of how to pass variables to a template:
1
2
3
4
5
6
7
8
from flask import Flask, render_template

app = Flask(__name__)

@app.route('/')
def index():
    name = 'John Doe'
    return render_template('index.html', name=name)
In the above code, we define a route using the @app.route decorator. The index function is associated with the root URL (“/”). Inside the index function, we define a variable called name with the value ‘John Doe’. We then pass this variable to the render_template function along with the name of the template file.
HTML Template (index.html)
1
2
3
4
5
6
7
8
9
<!DOCTYPE html>
<html>
  <head>
    <title>My Flask App</title>
  </head>
  <body>
    <h1>Welcome, {{ name }}!</h1>
  </body>
</html>
In the HTML file, we use double curly braces ({{ name }}) to indicate a placeholder for the value of the name variable passed from the Python code. When the template is rendered, the placeholder will be replaced with the actual value of the variable.
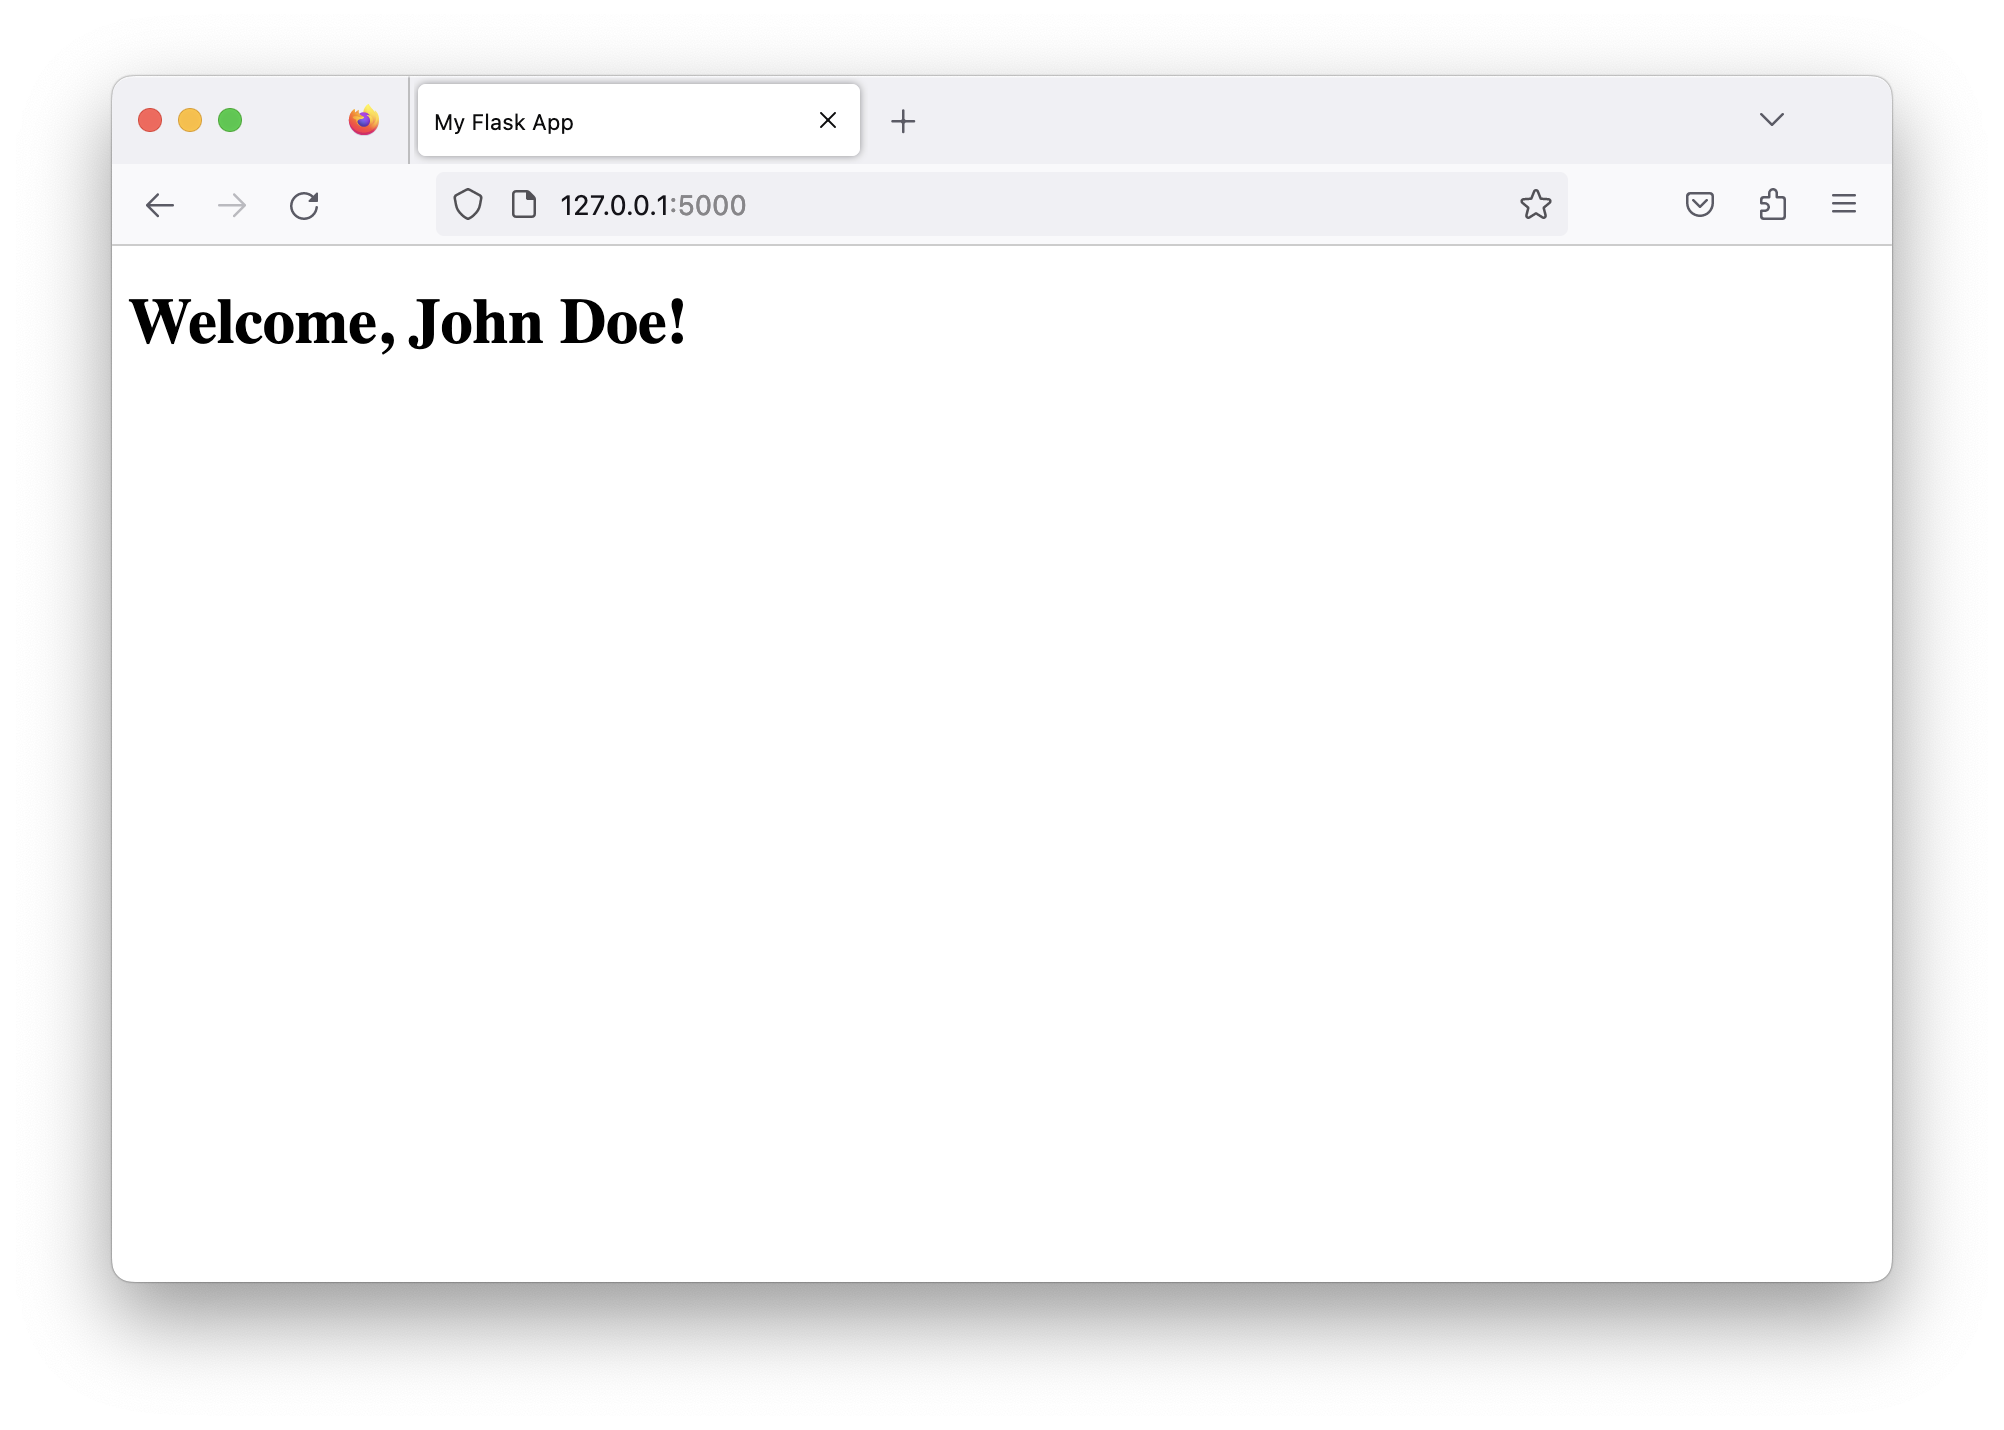 Rendered HTML
Rendering Templates Using Flask’s Template Engine
To render a template, we need to use Flask’s template engine, which is based on the Jinja templating language. Jinja allows us to include dynamic content, conditionals, loops, and other logic within our HTML templates.
To render a template, we use the render_template function provided by Flask. This function takes the name of the template file as an argument and returns the rendered HTML content.
Here’s an example of how to render a template:
1
2
3
4
5
6
7
from flask import Flask, render_template

app = Flask(__name__)

@app.route('/')
def index():
    return render_template('index.html')
In the above code, we have a route that maps to the root URL (“/”). Inside the index function, we call the render_template function and pass the name of the template file as an argument. Flask will automatically look for the template file inside the “templates” folder and render it.
FAQs
Q: Do I need to install any additional libraries to render HTML templates with Flask?
A: No, Flask comes with a built-in template engine based on Jinja, so there is no need to install any additional libraries.
Q: Can I use other template engines with Flask?
A: Yes, Flask supports other template engines as well. However, Jinja is the default template engine, and it is recommended for most Flask applications.
Q: Can I use CSS and JavaScript in my HTML templates?
A: Yes, you can include CSS and JavaScript in your HTML templates just like you would in any regular HTML file.
Q: How can I pass multiple variables to a template?
A: To pass multiple variables to a template, you can provide them as keyword arguments to the render_template function. For example:
1
return render_template('index.html', name=name, age=25, city='New York')
Inside the template, you can access these variables using the specified names.
Cheat Sheet
- Create a “templates” folder in your Flask project directory to store HTML templates.
- Use the
render_templatefunction provided by Flask to render templates. - Pass variables to templates by providing them as keyword arguments to the
render_templatefunction. - Flask’s template engine is based on Jinja, which allows you to include dynamic content, conditionals, and loops in your HTML templates.
- You can use CSS and JavaScript in your HTML templates.
- Flask supports template inheritance, which allows you to create a base template and extend it in other templates.
Remember to refer to the Flask documentation and the Jinja documentation for more detailed information and advanced usage.
Happy templating with Flask!
References:
- Flask Documentation: Official documentation for Flask provides detailed information on working with templates. You can find it here.
- Jinja Documentation: Jinja is the default template engine used by Flask. The official Jinja documentation offers comprehensive documentation and examples. You can access it here.