Setting up a Flask Development Environment
Learn how to install Python, set up a virtual environment, and create a basic Flask project structure for developing Flask web applications.
Flask is a popular Python web framework used for developing web applications. Before we start building Flask applications, it’s important to set up a development environment that includes Python and Flask. In this tutorial, we will walk through the steps to install Python, set up a virtual environment, and create a basic Flask project structure.
Prerequisites
Before we begin, make sure you have the following prerequisites installed on your system:
- Python: Flask is a Python web framework, so we need to have Python installed. You can download Python from the official Python website and follow the installation instructions for your operating system.
Step 1: Installing Python
To check if Python is installed on your system, open a terminal (Command Prompt or Terminal) and type the following command:
1
python --version
If Python is installed, you will see the version number. Otherwise, you will need to download and install Python from the official website mentioned above.
Step 2: Creating a Virtual Environment
A virtual environment is a self-contained Python environment that allows you to install packages and dependencies without affecting the global Python installation. It’s a best practice to create a virtual environment for each Flask project. Here’s how you can create a virtual environment:
- Open a terminal and navigate to the directory where you want to create your Flask project.
Run the following command to create a virtual environment:
1
python -m venv myenv
Replace
myenvwith the desired name for your virtual environment. This command will create a new directory namedmyenvthat contains the virtual environment.Activate the virtual environment by running the appropriate command based on your operating system:
Windows:
1
myenv\Scripts\activate
Unix/Linux:
1
source myenv/bin/activate
After activation, you will notice that your terminal prompt changes to indicate that you are now working within the virtual environment.
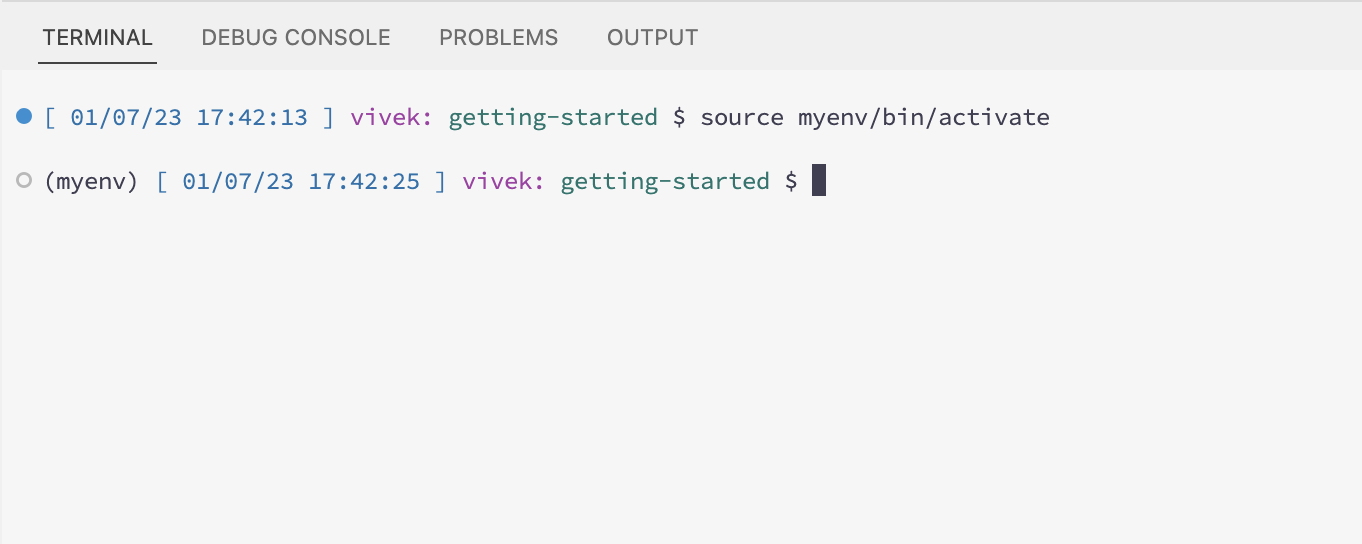 venv Activated
Step 3: Installing Flask
With the virtual environment activated, we can now install Flask. Run the following command to install Flask using pip, the Python package manager:
1
pip install flask
This command will download and install Flask and its dependencies into your virtual environment.
Step 4: Creating a Basic Flask Project Structure
Now that we have Flask installed, let’s set up a basic Flask project structure. Open your text editor or integrated development environment (IDE) and follow these steps:
Create a new directory for your Flask project. You can give it any name you like.
Inside the project directory, create a new Python script file. This file will contain the code for your Flask application. You can name it
app.pyor any other name you prefer.In the
app.pyfile, import theFlaskclass from theflaskmodule:1
from flask import Flask
Create an instance of the
Flaskclass:1
app = Flask(__name__)
The
__name__argument is a special Python variable that represents the name of the current module. It is used by Flask to determine the root path of the application.Define a route and a view function that will be executed when that route is accessed. For example, let’s create a simple “Hello, World!” route:
1
2
3
@app.route('/')
def hello_world():
    return 'Hello, World!'
In this example, the
@app.route('/')decorator specifies the URL path (/) that will trigger thehello_world()function.Finally, add the following code at the end of the script to run the Flask application:
1
2
if __name__ == '__main__':
    app.run()
This code ensures that the Flask application is only run if the script is executed directly (not imported as a module).
To run the flask application, in the terminal type the following command:
1
python app.py
This will start the Flask development server on your local machine.
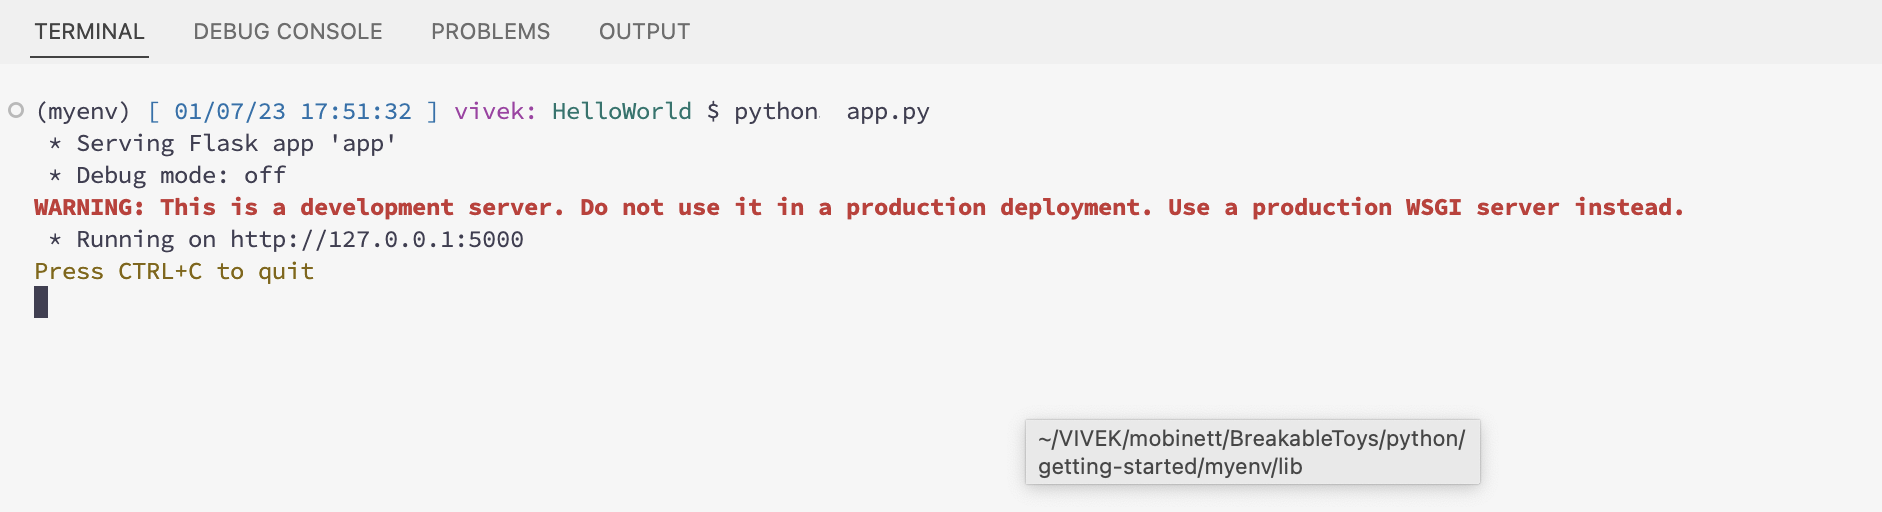 Flask Server Started
You can now access the application by navigating to
http://127.0.0.1:5000in your web browser.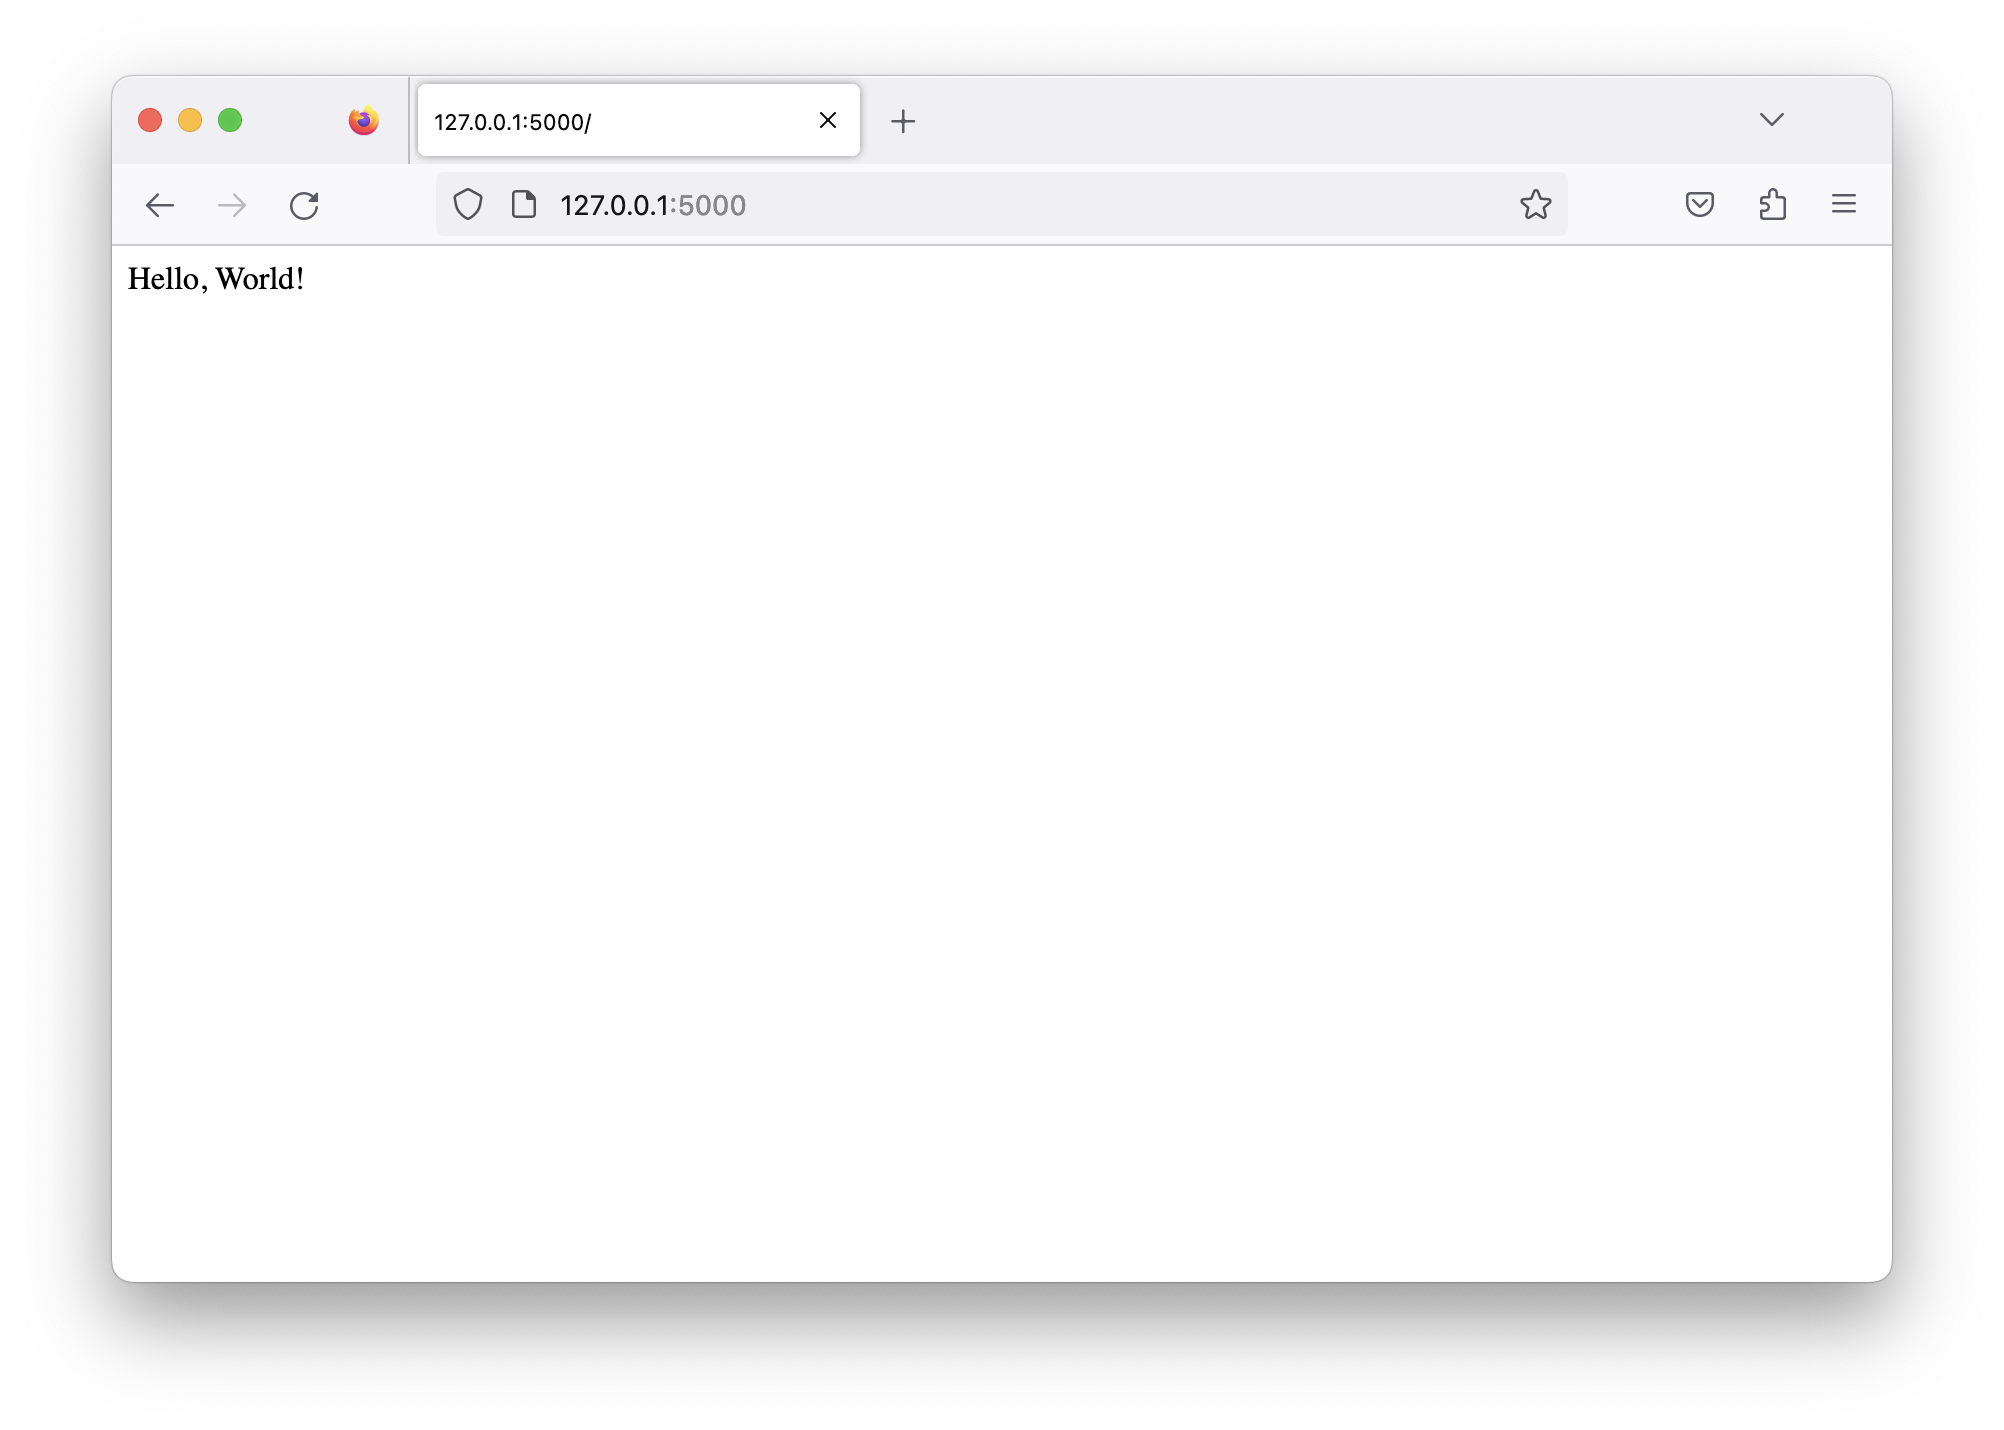
FAQ
Q: What is Flask?
A: Flask is a Python web framework used for building web applications. It is lightweight and easy to learn, making it a popular choice for web development.
Q: Why do I need a virtual environment?
A: A virtual environment allows you to create isolated Python environments for each project, ensuring that dependencies and packages don’t conflict with each other. It’s a best practice for Python development.
Q: How do I activate the virtual environment?
A: To activate the virtual environment, use the appropriate command based on your operating system:
- On Windows:
myenv\Scripts\activate - On Unix/Linux:
source myenv/bin/activateAfter activation, your terminal prompt will change to indicate that you are working within the virtual environment.
Q: How do I install Flask?
A: Once the virtual environment is activated, run pip install flask in the terminal to install Flask and its dependencies.
Q: How do I run a Flask application?
A: In your Python script, add the code app.run() at the end. Then, in the terminal, navigate to the project directory and execute the script with python app.py. The Flask application will start running on a local development server.
Feel free to refer back to this section whenever you have questions related to Flask development environments.
Conclusion
Congratulations! You have now set up a Flask development environment. You have learned how to install Python, create a virtual environment, install Flask, and set up a basic Flask project structure. You are now ready to start building Flask web applications.
Remember to refer back to this tutorial whenever you need to set up a new Flask project or refresh your memory on the steps involved. Happy coding!
References
Here are some helpful resources for further reading:
- Python Official Website - The official website for Python, where you can download Python and find additional resources.
- Virtual Environments in Python - Python documentation on creating and using virtual environments.
- Flask Official Documentation - The official documentation for Flask, providing comprehensive information and tutorials.